DS-160 US Visa: Complete Step-by-Step Guide
The DS-160 is one of the most important forms you’ll complete when applying for a U.S. nonimmigrant visa. Whether you’re planning to visit the United States for tourism, business, study, medical treatment, or a temporary work assignment, this online application is the foundation of your visa process. Consular officers use the information you provide in the DS-160, along with your interview, to determine whether you qualify for a U.S. visa. According to the U.S. Department of State, the DS-160 is required for almost all temporary visa categories, including B1/B2, F-1, J-1, H, L, O, and K visas.
Completing the form correctly is essential because even small mistakes can delay your application or require you to submit a new DS-160. The application must be completed online in English, and applicants should carefully review every answer before submission. Once submitted, you’ll receive a DS-160 confirmation page with a barcode, which you must bring to your visa interview. This guide explains everything you need to know—from required documents and step-by-step instructions to common mistakes and expert tips—to help you complete your application confidently.
What Is the DS-160 Form?
The DS-160 is an online Nonimmigrant Visa Application managed by the U.S. Department of State. It collects detailed information about your identity, travel purpose, employment, education, family background, and security history. Consular officers review this information before your interview, making it one of the most important documents in the visa application process.
Unlike paper applications used years ago, the DS-160 is completed electronically through the Consular Electronic Application Center (CEAC). After submission, applicants receive a confirmation page containing a barcode that links to their application. This confirmation page is mandatory for scheduling or attending most visa interviews.
Who Needs to Fill Out the DS-160?
You must complete a DS-160 if you’re applying for a temporary U.S. visa such as:
- Tourist Visa (B2)
- Business Visa (B1)
- Student Visa (F1)
- Exchange Visitor Visa (J1)
- Temporary Work Visas
- Fiancé(e) Visa (K)
Types of U.S. Visas That Require DS-160
Most nonimmigrant visa categories require this form, including:
| Visa Type | Purpose |
|---|---|
| B1/B2 | Business & Tourism |
| F1 | Students |
| J1 | Exchange Visitors |
| H1B | Specialty Occupation Workers |
| L1 | Intracompany Transfers |
| O1 | Extraordinary Ability |
| K1 | Fiancé(e) Visa |
Documents Required Before Starting the DS-160
Before opening the DS-160 application, gather every document and piece of information you may need. While you can save your application and return to it later, having everything ready from the beginning makes the process much smoother and reduces the chances of entering inconsistent information. Remember that the information on your DS-160 should match your passport, supporting documents, and any previous U.S. visa applications. Even small differences in names, dates, or employment history can raise questions during your interview.
At a minimum, you should have your valid passport, details of your travel plans (if available), your previous travel history, employment information, educational background, and contact details. Applicants for work, exchange, or student visas may also need additional documents such as the I-20, DS-2019, or petition approval notices. Keeping digital copies of these documents nearby can help you complete the application accurately without unnecessary delays.
Personal Documents
Your passport is the primary document required for the DS-160. Make sure it is valid for the duration required by U.S. immigration regulations and that all information is entered exactly as shown in the passport. You’ll also need your national identification number if your country issues one, details of any previous U.S. visas, and information about prior travel to the United States.
In addition to identification documents, you’ll be asked to provide your residential address, phone numbers, email address, marital status, and information about your immediate family members. If you have dual nationality or hold passports from multiple countries, you’ll also need to disclose those details honestly. The U.S. government cross-checks much of this information, so accuracy is essential.
Travel and Employment Information
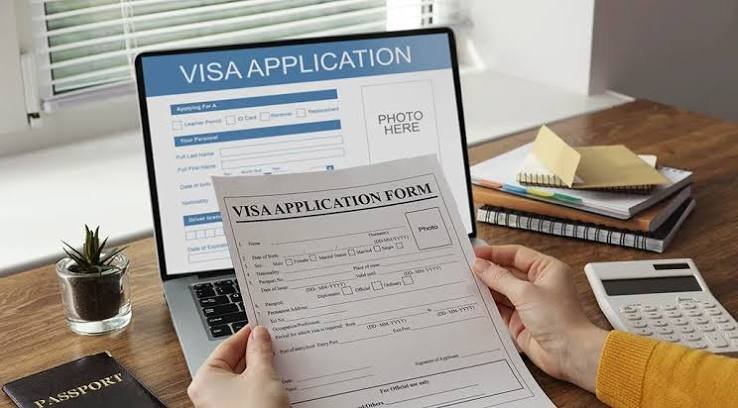
If you already know your travel dates, flight plans, or accommodation details, keep those handy while completing the application. Although confirmed bookings are not always required, providing realistic travel information helps ensure consistency throughout your application.
Employment information is another major section of the DS-160. You’ll need your employer’s name, address, job title, salary (if applicable), and a summary of your job responsibilities. Students should have information about their educational institution, while self-employed applicants should prepare details about their business. Retired applicants, homemakers, and unemployed individuals should also answer these questions honestly and provide accurate explanations where requested.
How to Fill Out the DS-160 Form
Completing the DS-160 may seem overwhelming because of the number of questions involved, but the application becomes much easier when you approach it one section at a time. The form is designed to collect comprehensive information about your background, travel plans, education, employment, and security history. Most applicants can complete the application within 60 to 90 minutes if they already have the necessary documents prepared.
One important feature of the DS-160 is that the session may expire after a period of inactivity. To avoid losing your progress, save your application frequently and write down your Application ID displayed on the first page. This ID allows you to retrieve your application later if you need additional time to complete it.
Create a New Application
Start by visiting the official Consular Electronic Application Center (CEAC) website and selecting the country where you will attend your visa interview. The location you choose determines the embassy or consulate that will process your application, so make sure it matches the location where you intend to schedule your appointment.
After selecting your location, you’ll receive a unique Application ID. Store this number in a safe place because it is required to retrieve your saved application. You’ll also create a security question and answer, which serves as an additional recovery method if you need to access the application later.
Complete Each Section Carefully
The DS-160 contains multiple sections that must be completed accurately. These include:
- Personal Information
- Passport Details
- Travel Information
- Address and Phone Details
- Family Information
- Education
- Employment History
- Security and Background Questions
Answer every question truthfully. Never guess or intentionally provide incorrect information. If a question does not apply to your situation, select the appropriate option such as “Does Not Apply” where available rather than leaving fields blank.
Upload a Visa Photo
Most applicants are required to upload a recent digital passport-style photograph that meets U.S. visa photo specifications. The photo must have a plain white background, proper lighting, and no filters or heavy editing. If the uploaded image does not meet the system requirements, you may still complete the DS-160 but will likely need to bring printed photographs that satisfy the embassy’s specifications on the day of your interview.
Before uploading your photo, verify that it meets the required dimensions, file size, and quality standards. An incorrect photo can delay the visa application process and may require additional verification at the embassy.
Review and Submit
Before clicking the final Submit button, review every section carefully. Pay special attention to passport numbers, birth dates, names, travel dates, and employment history. Once the application is submitted electronically, you cannot directly edit the answers. If you discover a significant error afterward, you may need to complete an entirely new DS-160 application.
After submission, print and save the DS-160 Confirmation Page with the barcode. This document is one of the most important papers you’ll need for scheduling your interview and attending your appointment at the U.S. Embassy or Consulate.
DS-160 Sections Explained
Many first-time applicants worry because the DS-160 asks for extensive personal information. However, every section has a specific purpose. Understanding why each question is asked can make completing the application much easier and help you avoid unnecessary mistakes. The form is designed to help consular officers verify your identity, evaluate your travel intentions, and determine whether you meet the requirements for a nonimmigrant visa.
Each section builds a complete picture of your background. Rather than rushing through the questions, take your time and ensure every answer is accurate and consistent with your supporting documents. If there are any changes in your circumstances after submitting the form, you should be prepared to explain them during your visa interview.
Personal Information
The Personal Information section is the foundation of your DS-160 application. It requests your full legal name, date and place of birth, gender, marital status, nationality, and any other names you have used in the past, such as maiden names or aliases. Every detail must exactly match your passport and official records. Even a small typo in your name or passport number can create unnecessary delays or require you to complete a new application. If your passport includes middle names or multiple surnames, enter them exactly as they appear.
You’ll also be asked whether you have ever held another nationality, permanent residence in another country, or a national identification number. These questions help U.S. immigration officials verify your identity and travel history. If a question doesn’t apply to you, choose the appropriate option instead of guessing. Consistency is essential because consular officers compare your DS-160 with your passport, supporting documents, and any previous U.S. visa applications. Taking a few extra minutes to review this section carefully can save you significant time later in the process.
Travel Plans
The Travel Information section explains why you want to visit the United States. Applicants should clearly state the purpose of their trip, whether it’s for tourism, business, education, medical treatment, or another approved nonimmigrant reason. If your travel dates are already planned, enter your expected arrival and departure dates. If your plans are still flexible, provide your best estimate based on your intended travel schedule.
You’ll also need to indicate who is paying for your trip. If you’re funding the journey yourself, simply state that. If a company, school, family member, or sponsor is covering your expenses, provide accurate information about the sponsor. The application may also ask where you intend to stay in the United States. This can be a hotel, university dormitory, relative’s home, or another temporary address. The information should be realistic and consistent with your travel purpose. For example, a student should normally provide the school’s location, while a tourist might list a hotel or host.
Family Information
The Family Information section requests details about your parents, spouse, and close relatives living in the United States, if applicable. Applicants must provide the names, birth dates, and other requested details for both parents, regardless of whether they are living. If you are married, additional questions regarding your spouse’s identity, nationality, and place of residence must also be answered.
Many applicants worry that having relatives in the United States automatically affects visa approval. In reality, having family members in the U.S. is not a reason for denial. The important factor is answering every question honestly. If you have immediate relatives who are U.S. citizens or lawful permanent residents, disclose that information exactly as requested. Attempting to hide family relationships can seriously harm your credibility during the visa interview.
Education and Employment
The Education and Employment section provides consular officers with a better understanding of your professional and academic background. You’ll need to list your current employer or educational institution, job title or field of study, employer’s address, salary (if requested), and a brief description of your daily responsibilities. Students should include accurate information about their school or university, while self-employed applicants should describe their business activities clearly.
The application also requests previous employment and educational history for many applicants. Provide accurate dates and avoid unexplained gaps whenever possible. If you are unemployed, retired, or a homemaker, answer honestly and explain your current situation where appropriate. Consular officers primarily use this information to understand your background and determine whether your travel purpose aligns with your personal circumstances. Consistency between your DS-160, supporting documents, and interview answers is extremely important.
Security and Background Questions
The Security and Background section is often the longest part of the DS-160, but applicants should not feel intimidated. These questions cover areas such as medical conditions, criminal history, immigration violations, security concerns, previous visa refusals, and other matters related to U.S. immigration law. The purpose is to identify issues that may require additional review, not to trick applicants.
Every question must be answered truthfully. Providing false information or intentionally hiding relevant facts can lead to visa refusal and may affect future immigration applications. If you have experienced a previous visa refusal or overstayed in another country, answer honestly and be prepared to explain the circumstances during your interview if asked. Transparency demonstrates credibility, while inconsistencies often lead to additional scrutiny.
Common Mistakes to Avoid
Many DS-160 applications are delayed because of avoidable errors rather than complicated legal issues. One of the most common mistakes is entering information that does not exactly match the passport. Incorrect spellings, missing middle names, wrong passport numbers, or inaccurate birth dates can create unnecessary complications. Applicants should also avoid rushing through the form without reviewing every section before submission.
Another frequent mistake involves inconsistent employment or travel information. For example, stating one job title on the DS-160 but presenting different information during the interview may raise questions from the consular officer. Similarly, providing unrealistic travel plans or failing to disclose previous visa refusals can damage your credibility. Since the DS-160 becomes part of your permanent visa record, honesty and accuracy should always be your top priorities.
Applicants should also remember these important tips:
| Common Mistake | How to Avoid It |
|---|---|
| Incorrect passport details | Double-check every number and spelling. |
| Wrong visa category | Select the visa type that matches your travel purpose. |
| Missing previous travel history | Provide complete and accurate travel information. |
| Inconsistent employment details | Ensure your answers match your supporting documents. |
| Forgetting the confirmation page | Print and save the barcode confirmation immediately after submission. |
DS-160 Fees and Processing
One important point that confuses many applicants is that there is no separate fee to submit the DS-160 itself. The form is free to complete online. However, applicants must pay the applicable Machine Readable Visa (MRV) application fee before scheduling a visa interview for most nonimmigrant visa categories. The fee amount depends on the type of visa you are applying for and may vary for certain work or petition-based visas.
After submitting your DS-160 and paying the required visa application fee, you’ll be able to schedule your biometric appointment (where applicable) and visa interview. Processing times differ depending on the embassy, visa category, security checks, and seasonal demand. Some applicants receive a decision shortly after the interview, while others may experience additional administrative processing. Checking the current appointment availability and estimated processing times at your local U.S. Embassy or Consulate can help you plan your travel more effectively.
What Happens After Submitting the DS-160?
Submitting your DS-160 is a major milestone, but it is only one part of the U.S. visa application process. After you click the submit button, download and print the DS-160 Confirmation Page with the barcode. This document is mandatory for your visa interview and should be kept with your passport and other supporting documents. Without the confirmation page, you may not be allowed to proceed with your appointment.
The next step is to pay the applicable visa application fee if you have not already done so. After payment is confirmed, you can schedule your biometric appointment (where required) and your visa interview at the U.S. Embassy or Consulate you selected in your application. Make sure the DS-160 confirmation number matches the number used when scheduling your appointment.
On the day of your interview, arrive early and carry all required documents. These typically include:
- Valid passport
- DS-160 confirmation page
- Visa appointment confirmation
- Visa fee payment receipt
- Passport-sized photographs (if required)
- Financial documents
- Employment or education documents
- Invitation letter or supporting documents (if applicable)
During the interview, the consular officer may ask questions about your travel plans, employment, family, finances, and reasons for visiting the United States. Answer confidently, honestly, and consistently with the information you entered on your DS-160. In many cases, the interview lasts only a few minutes, but your preparation can make a significant difference.
Tips to Increase Your Chances of Visa Approval
Although no one can guarantee visa approval, following best practices can greatly improve your chances. The most important rule is to provide truthful and consistent information throughout the entire application process. Your DS-160, supporting documents, and interview answers should all tell the same story. Any discrepancies may lead to additional questions or even a visa refusal.
Strong documentation is equally important. Bring evidence that supports your purpose of travel, such as employment letters, bank statements, university admission letters, business invitations, or conference registrations. These documents help demonstrate that your trip is genuine and temporary.
Keep these practical tips in mind:
- Complete every section carefully without rushing.
- Review the application several times before submitting.
- Never submit fake or altered documents.
- Dress professionally for your interview.
- Arrive at the embassy well before your appointment time.
- Listen carefully to each question and answer clearly.
- Avoid giving unnecessary information that was not requested.
- Maintain a polite and confident attitude throughout the interview.
Remember that consular officers evaluate the complete picture of your application. Confidence comes from preparation, so familiarize yourself with your own DS-160 before attending the interview.
Conclusion
The DS-160 US Visa Application is one of the most important steps in obtaining a U.S. nonimmigrant visa. While the form may appear lengthy, completing it carefully and honestly greatly reduces the risk of delays or complications. Every section—from your personal information and travel plans to your education, employment, and security questions—helps the U.S. Embassy understand your background and determine your eligibility for a temporary visa.
Preparation is the key to success. Gather your documents before you begin, answer every question accurately, review the application thoroughly, and save your confirmation page after submission. Following the official instructions and ensuring consistency between your DS-160 and interview responses will help you approach the visa process with confidence. Whether you’re traveling for tourism, business, education, or temporary employment, a properly completed DS-160 is the first step toward achieving your goal of visiting the United States.
Frequently Asked Questions (FAQs)
1. Is the DS-160 form free?
Yes. The DS-160 application itself is free to complete online. However, applicants must pay the required nonimmigrant visa application fee before scheduling their visa interview.
2. Can I edit my DS-160 after submitting it?
Once submitted, you cannot directly edit the application. If you discover a significant error, you will usually need to complete and submit a new DS-160 form and use the new confirmation number if permitted by your embassy.
3. How long does it take to complete the DS-160?
Most applicants finish the application in 60 to 90 minutes, depending on their travel history and how well prepared they are with the required documents.
4. Do I need to print the DS-160 confirmation page?
Yes. The confirmation page containing the barcode is required for your visa interview and should be printed immediately after submission.
5. What happens if my DS-160 session expires?
The system automatically logs users out after a period of inactivity. To avoid losing your work, save your application regularly and keep your Application ID so you can retrieve your progress later.